Not sure if gluten-free is right for you? This guide will tell you who should be eating gluten free, and how to seamlessly incorporate it into your diet!
Going gluten-free can feel confusing at first. Some people need to avoid gluten for medical reasons. Others try it because they’re dealing with bloating or stomach pain and want to see if it helps.
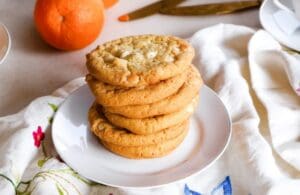
Either way, the hardest part is usually the same: finding gluten-free food that still tastes like real food, especially bread, pastry, and baking staples.
Read on to learn what gluten is, who should avoid it, the real benefits of eating gluten-free (when it’s the right choice), and discover our favourite gluten-free recipe ideas.
What is gluten?
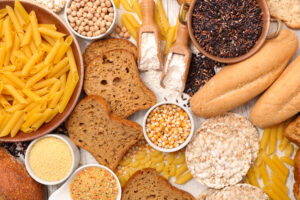
Gluten is a protein found in grains like wheat, barley, and rye. It helps dough stretch and hold together, which is why regular bread and pastries can be chewy and fluffy. Gluten is common in foods like bread, pasta, cereal, and your favourite baked goods.
Gluten isn’t an essential part of a healthy diet, but for many people, gluten foods include wholegrains that provide fibre and other nutrients. If you cut it out without a solid plan, you might miss out on the good stuff your body needs.
Who should avoid gluten?
People avoid gluten for various reasons, ranging from mild sensitivities to serious medical conditions. Here are the most common reasons for choosing a gluten-free diet:
People with coeliac disease
For people with coeliac disease, gluten triggers an immune reaction that damages the gut. For those with coeliac disease, a strict gluten-free diet is often recommended by healthcare professionals.
People with a wheat allergy
A wheat allergy is different to coeliac disease. It’s an allergy response that can cause symptoms after eating wheat. Some people with wheat allergy choose gluten-free products because they’re often wheat-free, but it’s still important to read labels carefully.
People who feel unwell when they eat gluten (non-coeliac sensitivity)
Some people test negative for coeliac disease but still get symptoms like bloating, diarrhoea, or stomach cramps after eating gluten. The diagnosis isn’t always clear-cut, but many people feel better when they avoid gluten.
Important note: If you think gluten is causing problems, speak with your GP before cutting it out.
Benefits of a gluten-free diet
A gluten-free diet can be a big help when it matches your health needs.
- Less gut discomfort if you react to gluten, like less bloating or bowel issues.
- Better nutrient absorption for people with coeliac disease once the gut begins to heal.
- More energy and improved well-being for people who have an undiagnosed sensitivity and feel better off gluten.
For people who don’t react to gluten, there’s no strong evidence that removing it automatically improves health. Plus, many packaged gluten-free foods cost more and can be lower in fibre and key nutrients.
Why gluten-free food can be hard to get right
Many gluten-free foods can be disappointing for one simple reason: gluten provides structure. Take it away, and you can end up with dry cakes, crumbly pastry, and bread that falls apart.
Some gluten-free products compensate for texture with added sugar or fat, so while they are gluten-free, they are not always the healthiest option. The good news is, when you have the right staples, gluten-free cooking becomes much easier, and you don’t feel like you’re missing out.
That’s where Zone Fresh can really help. You can shop for fresh produce and pick up reliable gluten-free pantry and freezer items in one place.
Here are a few gluten-free stand-outs stocked at Zone Fresh:
Our favourite gluten-free recipes
Below are gluten-free recipes that either use gluten-free ingredients or are gluten-free versions of classics:
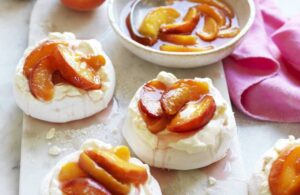
Plum and White Chocolate Dessert Cake
This delicious plum and white chocolate dessert cake is a great example of a classic dessert you can still enjoy gluten-free. The plums bake into the sponge, the white chocolate melts through, and it comes out soft and rich. The only real gluten issue is the self-raising flour (plus the icing sugar dusting, if you’re being strict about labels).
Make this recipe gluten-free with the following changes:
- Replace the SR flour with FREEMILLS Gluten-Free Self-Raising Flour, 750g (cup-for-cup baking flour).
- Finish with CSR Gluten Free Pure Icing Sugar for dusting.
View the recipe here.
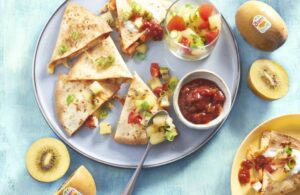
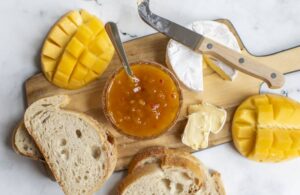
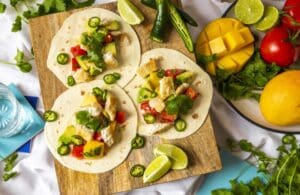
Fish Tacos with Fresh Mango Salsa
Taco night is one of the first things people miss when they go gluten-free. Mostly because tortillas are often made with wheat. This recipe keeps everything you love (fresh fish, zesty lime, sweet mango salsa), but the simple gluten-free fix is to swap the wraps.
Zone Fresh gluten-free swap: use WATERSTEPS Organic Yellow Taco Sheet (Gluten Free) in place of standard tortillas. They’re made from organic corn flour and are labelled gluten-free, so you still get that proper taco crunch without wheat.
View the recipe here.
Gluten-free doesn’t have to mean second best
If you need to avoid gluten, you deserve food that still tastes great; meals you’re happy to serve your family, and snacks you actually look forward to.
The easiest path is:
- stock a few reliable gluten-free basics (flour, pastry, baking sugar), and;
- build most meals around fresh produce, quality proteins, and simple flavours.
Zone Fresh makes that easier by having fresh fruit and veg plus trusted gluten-free products ready to go, so you can spend less time label-reading and more time enjoying what you cook.